Thursday, August 1, 2013

Embellish! A Pumpkin Tutorial

Pumpkin Tutorial
 Welcome!

(Please click on pictures for larger image and to see print appearing on the pictures)

Why am I writing about how to embellish a ordinary fabric pumpkin?  Easy!  To turn it into an "extra"ordinary pumpkin!  Also, every technique you will apply to the pumpkin,  can be applied to the embellishment of your Art Dolls, including lace covered fabric, glittered fabric and leaves or other items, and more.  By the end of this tutorial, you will be able to make your own embellished pumpkin and have fun learning techniques you can apply to your doll and accessory designing skills!  

Embellished Pumpkin
Spin off on this pumpkin and make a plain orange pumpkin, then embellish with crystal swirls like the ones featured in shops and magazines for $50.00 a piece!  Make three pumpkins in varying sizes and embellishments for the beginning of a wonderful fall display


Just a note to my very Prim Friends and Prim Artists...This pumpkin would also do well made out of muslin, then painted and stained with tea stain coffee stain and "grubbied up" instead of all the "bling".  I've done many pumpkins in the past that way and was very pleased with  results (Pic A).  This pumpkin was painted in acrylics, sanded, and then stained for a very primitive look.

pic A


This Pumpkin in (pic B) is large enough for me to sit one of my bears on back when I was a Teddy Bear Artist( I guess I still am...but bears cost so mush to make).  The only difference is that it uses a larger wedge pattern and more wedges.  More wedges make for a slightly flatter pumpkin and therefore will balance larger dolls or, in this case, bears.  This bear's name is Smudge and he is still one of my favorites!


pic B


The pumpkin you will make from this tutorial, is very much like the one you have seen in this year’s Art Doll Quarterly Fall 2013. Just look at my Bird Cage Doll, Marguerite, below  (pic 2) ,
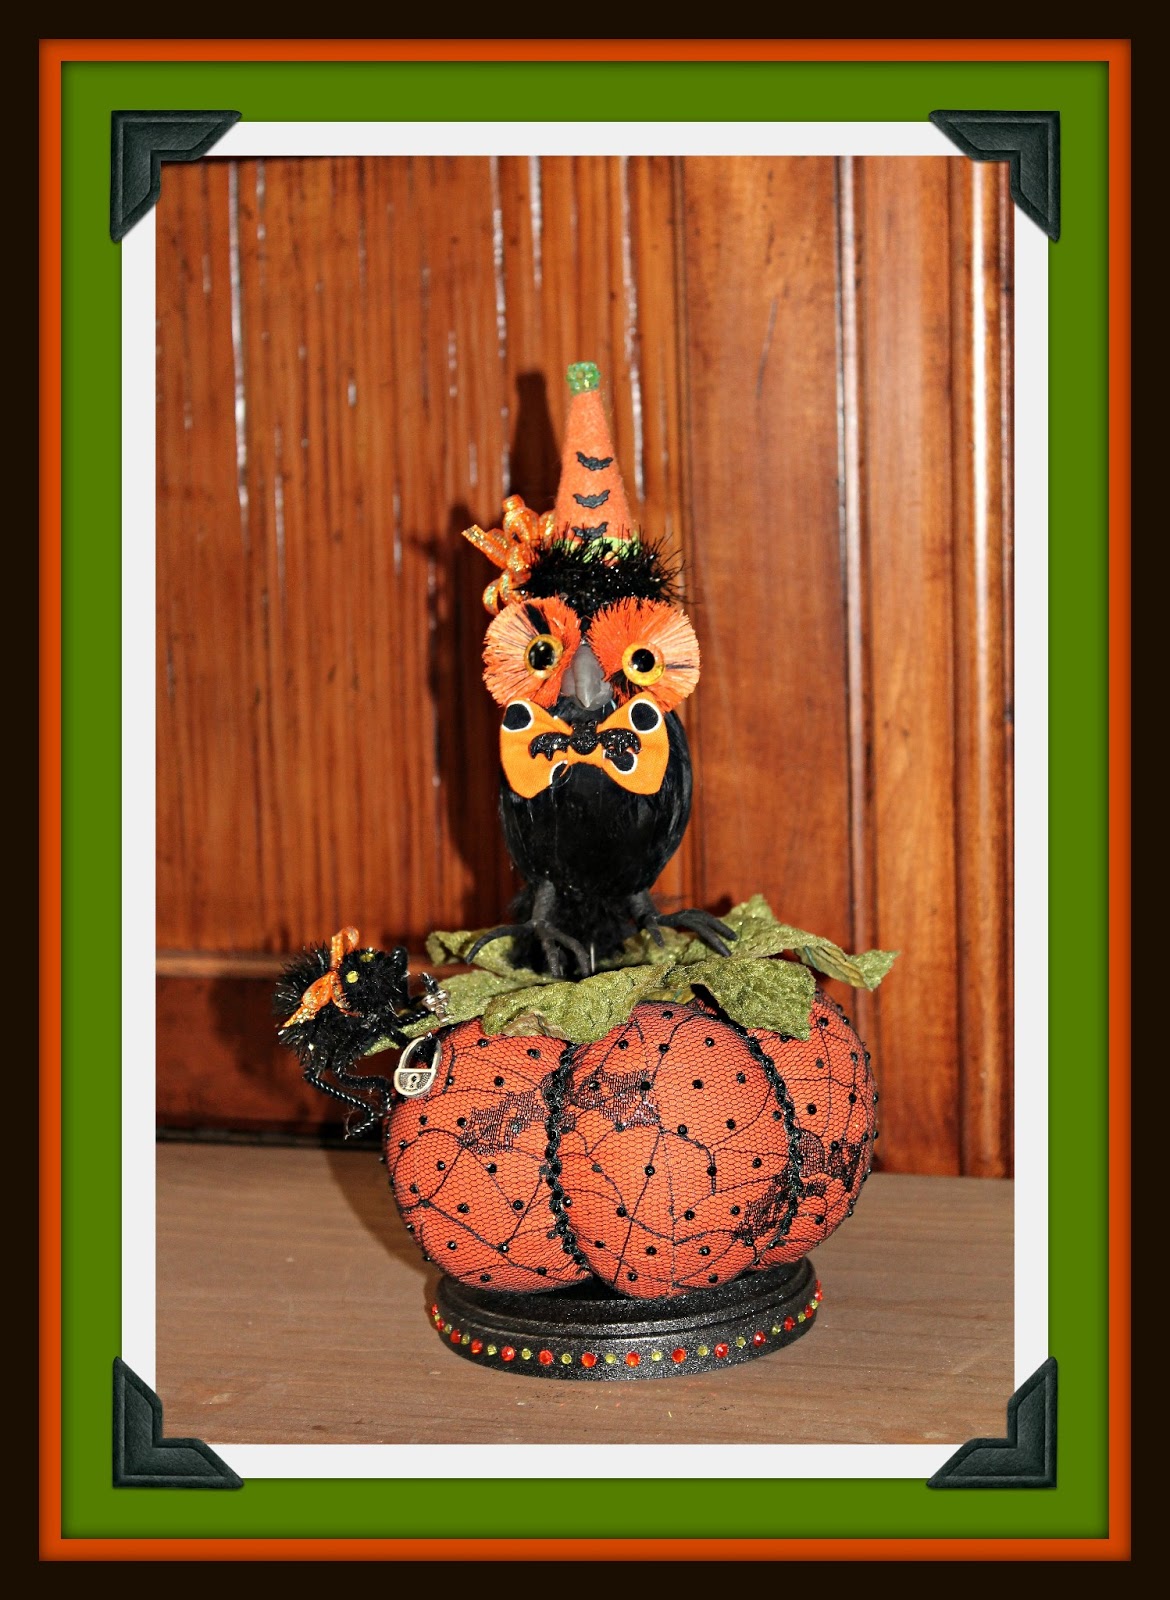
and you will see the little owl sitting on it inside the cage (pic 1)


pic 1
This is a Pumpkin Tuffet for a doll or a critter to sit on and therefore it has no stem.  In this case, a stem would just get in the way.  If you want to make a normal (or should I say "more" normal) pumpkin, I would recommend to  just fashion a stem out of a little green felt.

pic 2
Please send me an email with any questions you may have, and I will post the questions with the answers in the comment section of this blog.  Also, I would like all of you who make this pumpkin to submit the pictures to me so I may publish them on my site.  Don’t be afraid to experiment!  Perhaps you want a purple pumpkin, different lace, and with another trim and a different color crystal…have fun with it!!!  

Before beginning, you may want to review the article in Art Doll Quarterly to better prepare yourself for the techniques you will be using in this tutorial.  The Fall 2013 issue is available from the publisher at Stampington,  Barnes and Noble and various other fine book stores and craft stores.


Click arrow above for Video


Tools and Materials


 (some knowledge of general sewing techniques is required)
  • Scissors 
  • Hot glue gun
  • Hot fix crystal applicator (Mine is Made by Darice - see links)
  • Cotton print fabric at least 26 inches by 24 inches (see links)
  • Black lace fabric about 2 inches by 2 inches (see links)
  • Mastex thread (available through Edinburgh Imports-see links)
  • Two approximately 1" sturdy buttons JoAnn's or Walmart)
  • One 5" sculpting needle
  • One package of 7 mm rick rack in black
  • Size 16ss olive or black hot fix crystals (see links)
  • Elmer's Spray Adhesive
  • Hot Glue sticks
  • Five green Millinery leaves approximately 3 inches long by 2 inches wide
  • Lime green ultra fine glitter (available at many craft stores)
  • Polyfil stuffing 
  • One 4 inch beveled wood base (bought mine at JoAnn's but not online)
  • Black acrylic craft paint
  • Paint brush
  • Matte Interior Varnish by Delta Ceramcoat
  • Glamour Dust (glitter paint) Black Ice by DecoArt, sent to me by my swap box pal, and found at Micheal's  
  • Sewing Machine
  • Fabri-tac fabric glue
  • Large Books (to hold weight in place Step 20)
Useful Links
·       
     Stampington http://stampington.com/whats-new/whats-new-coming-soon/Art-Doll-                Quarterly-Autumn-2013 request your magazine today!

      Fabric  http://www.joann.com/  for other Halloween fabric of your choice

      Fabric      http://www.joann.com/halloween-spooky-prints-fabric-black-dot-on-       orange/zprd_11668480a/  for the fabric I used on the pumpkin
      Lace   http://www.joann.com/search/_black%20lace%20bats/  for the lace I used on the pumpkin

      Crystals  http://www.ebay.com/itm/1440-10G-16SS-4mm-RHINESTONES-HOT-FIX-IRON-ON-OLIVE-FLATBACK-GLASS-/261180241788?pt=LH_DefaultDomain_0&hash=item3ccf8e377c  very important how you order these and make sure they are not from overseas!  I learned the hard way that things coming from China are on a very slow boat!

       MastexThread    main_page=advanced_search_result&search_in_description=1&keyword=mastex&inc_subcat=0&    sort=20a&page=2  Very strong thread that is great for sculpting!

      Millinery Leaves  http://www.ebay.com/itm/Vintage-Millinery-Flower-Large-Velvet-Leaves-Y19-Green-/390036875980?pt=LH_DefaultDomain_0&hash=item5ad0026acc be sure to get leaves that come with a wire down the middle and protrudes out from the leaf stem about 2.5 to 3 inches.  Holding the wire while you glitter is very helpful!  I prefer velvet leaves.
                      
·          

Pattern


 Several Examples of Lace Covered Cotton Print


3-A

3-B


3-C


Here We Go!

Step 1- Choose a piece of fabric and a piece of lace.  For teaching purposes, I have chosen an orange with black dots cotton print fabric and a fairly open, bat-patterned lace.  (found at JoAnn’s online, see useful links section)

pic 4


Step 2- Fuse the lace fabric to the cotton fabric.  This is done by spreading out your 26 inch wide by 24 inch high, cotton fabric, face up, and smooth (iron if needed).  Then take a piece of your lace, the same size or  a little larger and have it ready to lay over the dotted fabric. Be sure to protect work surfaces with newspaper or plastic (pic 4). 

 Now, take your Elmer’s Spray Adhesive and spray lightly over the cotton piece.  Immediately, but without hurrying, place your lace, face up over the cotton and smooth it from the center, outwards.  You may lift slightly and adjust the lace until it lies flat. A ruler may help with smoothing the fabrics better than your hand. 

You now have a two layer, custom, fabric with which to make your pumpkin! See how the cotton pattern peeks out between the lace pattern?... Let it dry several hours. You have just embellished your cotton with lace…the same way I did Marguerite’s bodice! 


Step 3 - Trace the wedge pattern over the fabric you have created.  I usually trace on the right side of the fabric to make sure I  can place the pattern exactly where I want to with respect to the lace pattern,  including as much of the bat design as you can.  If, for instance, you traced on the back of the fabric, you wouldn't be able to see what part of the lace was included in each cut. (pic 5).  

Label one end the "Top" and one end thee "Bottom".  Pin so that all the tops are facing the same direction.


pic-5


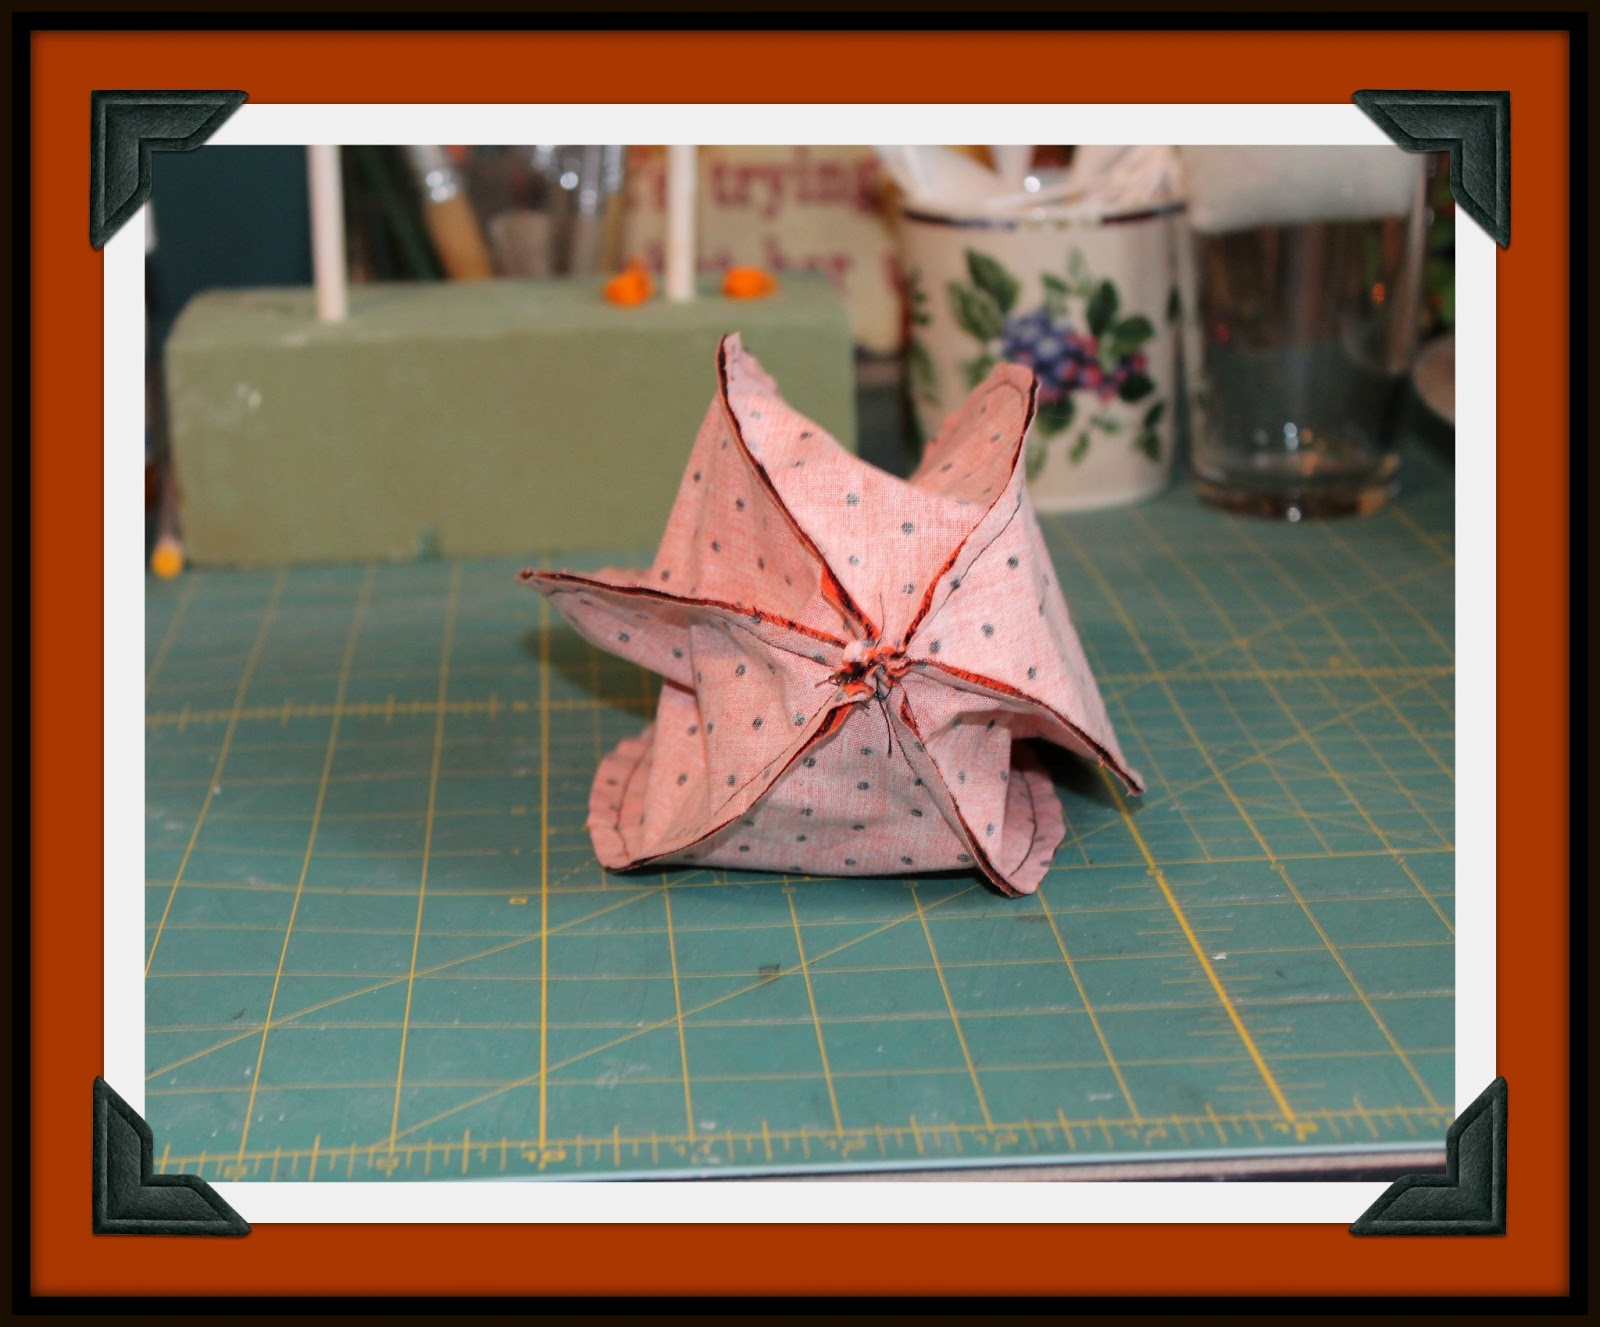
Step 4 - Now sew the wedges together (right sides facing each other) two at a time until you have 3 wedge pairs (pics 6&7).


pic-6
You are going to sew the pairs together until all three of the pairs are connected (pics 7, 8 & 9). Be sure to keep the top of the wedges together or your pumpkin may become lopsided!  

pic-7


pic-8


pic 9


Make sure to leave 1/2 inch open seam at the bottom of each pair and at the bottom when sewing pairs together. You will use this opening to turn your pumpkin right-side out, so don't let it get too small. Now, stuff your pumpkin firmly, but not too tight, with the Polyfil (pic 10).


pic 10

Step 5 - Using the five inch sculpting needle, attach one of your large buttons, using the mastec thread. (I double-thread my needle, even with this strong Mastex)Then begin to sculpt each wedge in half (pic 11 & 12)  When bringing the needle up through the middle of the pumpkin, exit just outside the button's edge, but do not come through the buttonholes. The thread...visible here ( pic 11),  will not show on your finished pumpkin. 


pic 11


Pull tightly to crease the wedge and then wrap thread around the button several times to hold it tightly.  Go back down through the pumpkin and knot thread to bottom securely (pic 12). Repeat sculpting for each of the  six wedges.  I usually re-thread for each wedge


pic 12-A


pic 12-B
The picture above shows how the top of your pumpkin should look after sculpting (pic 12-B).

The picture below shows the bottom of  the pumpkin as it should look when sculpting is finished (pic 12-C).


pic 12-C

OOPS!

 My little ghouls look as if they are thinking they want some Pumpkin Pie!


pic 13

Step 6 - The next step is pretty easy.  Make sure you have practiced a little with your crystal applicator beforehand as sometimes it can be a little tricky. Be sure you have the correct tip in place, a size 16ss, to match the size of the crystal.  Heat the gun and apply the crystals to the rick rack as shown (pic 13).

I place the crystals along the rick rack in a zigzag pattern that corresponds to the pattern of the rick rack (pic 13-B).  If a crystal won't detach properly from the applicator, keep it in position and gently poke a straight pin down the slot above the crystal.  Put a little downward pressure on the crystal with the pin, holding it in place, while carefully lifting the applicator off the crystal .


pic 14


 Now heat your glue gun.  Lately, I've been using a spare beverage glass to hold my glue gun (pic 15).  It seems to keep it upright. is less messy, and protects surfaces from the hot glue tip.


 pic 15


Step 7 -You are ready to attach the rick rack to the pumpkin!  Beginning at the bottom of the pumpkin, hot glue the rick rack over the needle sculpting that you did in step 5.  This will completely cover  the sculpting thread (pic 16).  Continue up the pumpkin a little bit at the time until you reach the edge of the button. Going slowly helps to keep you from making mistakes like getting the glue on your new lace fabric. I use a maneuverable mini glue as it is much easier to control.

pic 16

Your creation is really beginning to look like a tuffet!!! (pic 17)

pic 17


Step 8  Ready to "BLING" again?  Some of you may have you may have noticed...I'm always ready for that! So, prepare and protect your work surface, get out your glitter, spray adhesive, and Millinery leaves and let's get ready to "blow" glitter.

Please see Art Doll Quarterly's article on "The Bling Factor" due out August                                 1, 2013. There, inside, are complete instructions on "blow" glitter.  It is available                         from my publisher, Stampington, and also Barnes and Noble book stores.  I'm sure it is also available at many other fine bookstores and craft supply stores See Useful Links).


pic 18
     
                 
Step 9  Great Job!  Your leaves are glittered!  Good Job! After your leaves dry, take a leaf and press it up next to the button on top of the pumpkin.  Wrap the wire around the button, being careful to tuck it under the button and out of sight as you go around it (pic 19).  


pic 19
Take the wire jewelry snips and snip off any leftover wire (pic 20).  Continue adding leaves until you have five or six placed evenly around the button.  some leaves will overlap each other slightly,  giving them a very natural look (of course, what is natural about a bejeweled pumpkin?) 


pic 20

Gently coax the leaves into position, bending some tips up and some tips down for a life-like appearance.  This is know in the floral world as "re-flexing"(pic 21)


pic 21

Now, stand back and admire your pumpkin and what you've done so far!  You are almost finished!  All there is left to do is to cover the button and make the base!

Step 11-  Take your second button and trace it's outline on the wrong side of the 2 x 2 pin dot fabric.  Cut the circle out, leaving approximately 1/4 - 3/8 inch around the circle you have traced (like a seam allowance) pic  22 -25. 
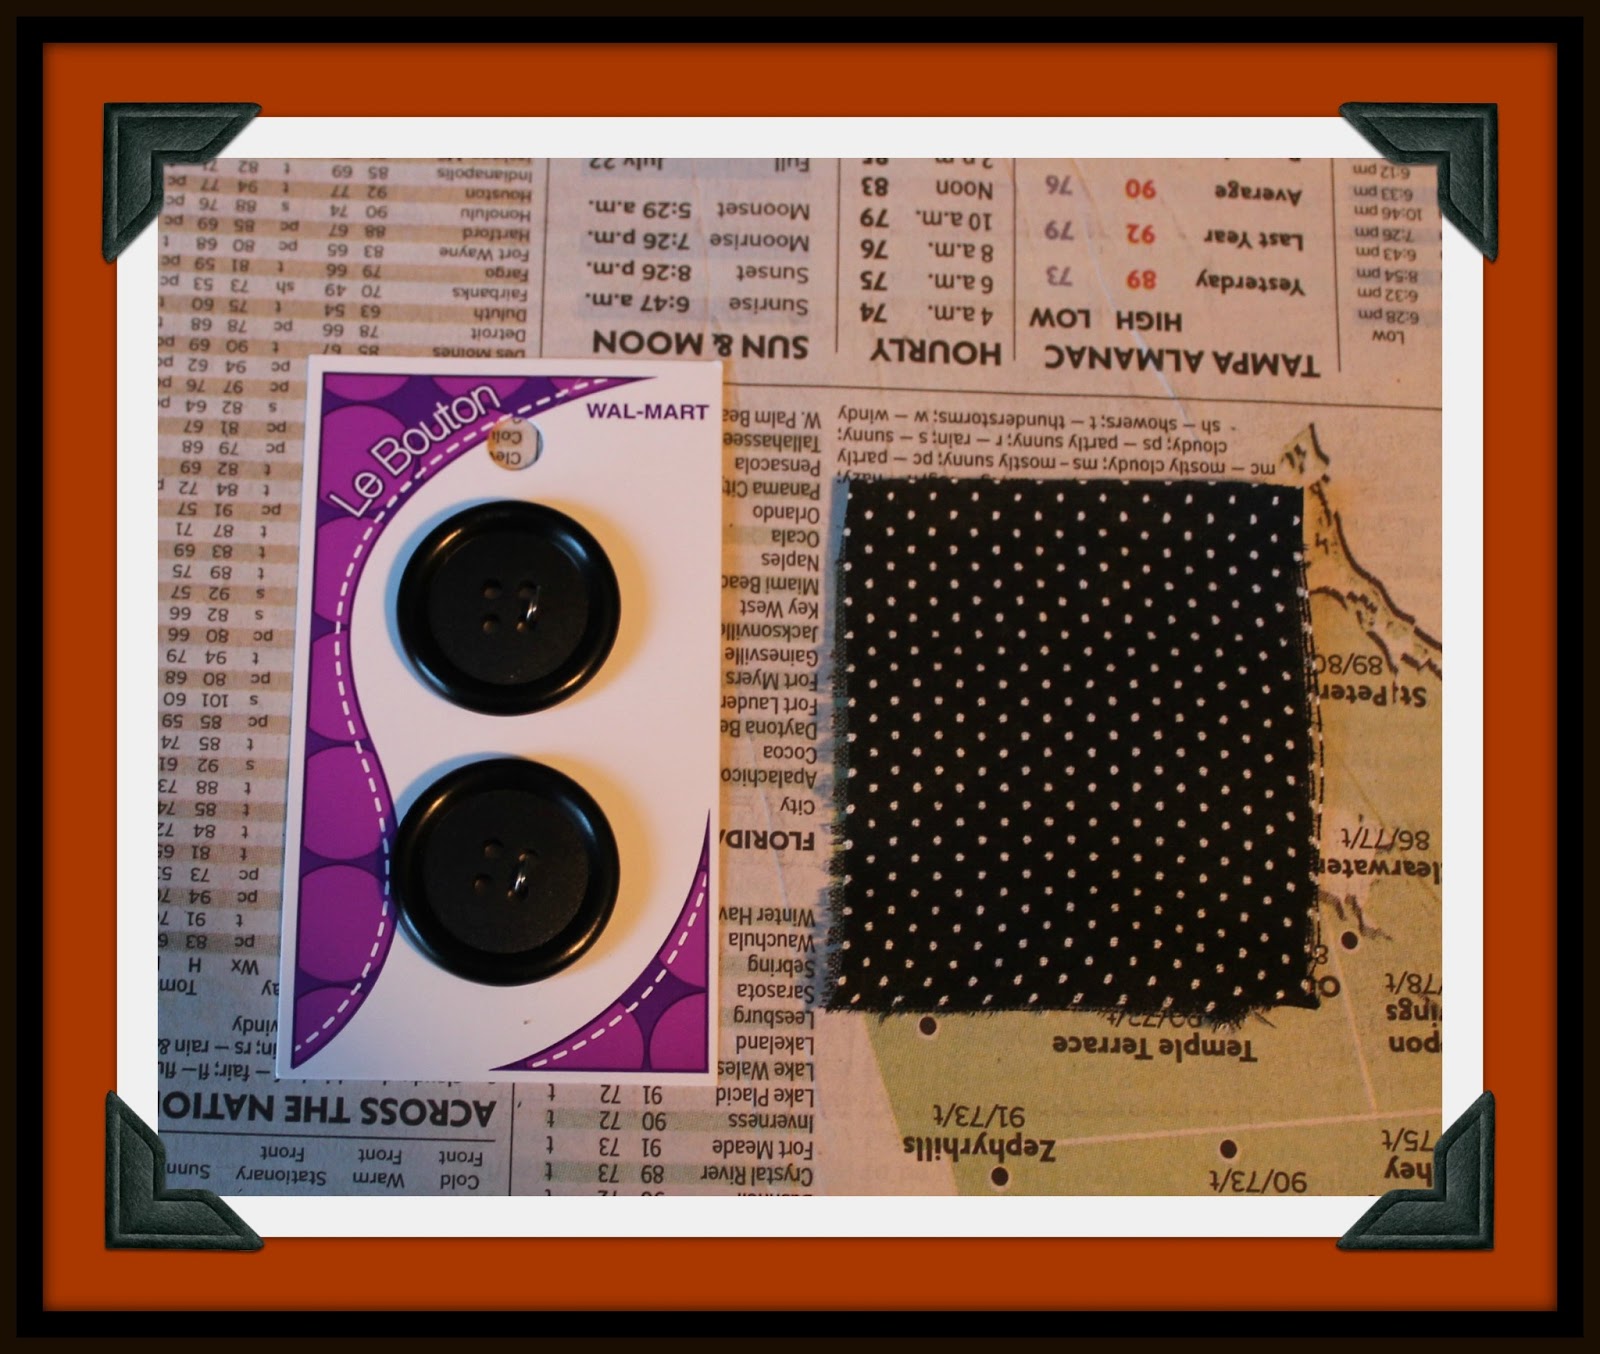
pic 22


pic 23


pic 24
 Step 12   Using a small drop of hot glue, glue the button to the middle of your circle, keeping the glue on the wrong side of the fabric (pic 25 and 26). 


pic 25


pic 26


Step 13   Snip the fabric around the button to the edge of the button...each flap should be about 1/4 inch apart.  Encircle the button with a thin line of hot glue.  As you go around the button, press the cut edges snugly against the edge of the button (pic 27 and 28).


pic 27


pic 28
Now you have a nice little pin dot covered button that will give you a finished look for the top of your pumpkin!  This technique gives you a nice custom button for many applications.  I can easily see it as the center for a large sunflower.


pic 29
  
Step 14   Hot glue the fabric covered button directly over top of the exposed button, being careful not to get glue on the pumpkin (pic 30 and 31).


pic 30


pic 31
Wow!  You are almost finished!!!  All you have to do is make a base and your Halloween Doll will have a Pumpkin Tuffet to sit on!

Step 15  Gather the supplies to paint the wooden base.  Paint it with 2 coats of black acrylic craft paint allowing it to dry between coats (pic 32 and 33).

pic 32

 When I am working with just a little bit of paint, it is not unusual for me to squeeze a little onto my wax paper and wet my brush from there.  When you have finished your first coat, remove the newspaper and allow your base to dry on wax paper...otherwise,
the newspaper will stick to the edge of the base  
pic 33  
Step  16   Paint one coat of glitter paint (pic 34 &35) and allow to dry for an hour or so...


pic 34


pic 35

Step 17  Varnish your base with one coat of the Matte Interior Varnish by Delta Ceramcoat.  Let it dry for a few hours (pic 34) Allow to dry on wax paper.


pic 36


.Step 18   Paint one more coat of glitter paint...yep, apply it over the varnish.  This really helps the glitter to shine! 


pic 37

Time to Really Bling!

One key factor in crystaling, in order to stay organized, is to find the right organizer.  This one shown  (pics 38 and 39), was found at Walmart. For me it is the best I've found if you plan to crystal quite often.  The sections just unscrew for ease of removal and you only need to have out the colors you need at the time.


pic 38


pic 39

.Step 19  Using the same technique as Step 6, place your crystals around the base about 1/4" to 5/8"apart as shown in pics 40 and 41. 


pic 40

pic 41
Last Step!  You're almost there!

*need pics and text of gluing

Step 20  Got your books ready??? You are going to need them! (pic 42)   

pic 42


Turn your pumpkin over and apply the Fabri-tac to it's underside (pic 43). 


pic 43


Then, being careful not to drip glue, turn it over and center it over the base.   I just set it down in  the spot I think will center it.  If the glue is applied as shown, small adjustments can be made once it is placed...turn the pumpkin and base around slowly, check to make sure it is centered all around and does not overlap the base anywhere (pic 44).


pic 44

Keeping it in place, gently press it down as you place your books on top of the leaves and add the weight.  Yes, it will look silly for a day....(pic 45)


pic 45

But, just wait 'till you remove the books!!!  All you have to do is adjust your leaves one last time...

Now, your embellished Pumpkin is finished!


Ta Da!  The Finished Product!
Please go and take some pictures of your pumpkin and send them to me for publishing here on my blog!!!


Copyright 2013  C.R. Smith


This document is the property of C.R. Smith and any reproduction in whole or in part is strictly prohibited.  This document is intended for personal use, with the emphasis on recreational crafting, and private craft shows. The use of this document and the contents thereof is not permitted in such a way that it may be used by any persons for commercial use or sale, without the expressed written consent of Carolyn Rene Smith. By using this document, you agree and adhere to the preceding terms, and any violation thereof is subject to penalty by law..


Wednesday, July 31, 2013

Pumpkin Tutorial Tools and Supplies


Hey there Ya'll!!!

Tutorial begins at 1pm EST...See you there!
Well folks, my first online tutorial and I've already overlooked something...I should have posted a list of tools and supplies last week so you could get ready...not to worry though, as I will be keeping the tutorial up as a permanent part of my blog that you just scroll down to see, and I will be putting it under a Tutorial Section that I will be constructing soon!

I'm posting this now so you can go through and see what you already have, and also so that you know what else you need to make your pumpkin.

Tools and Materials


 (some knowledge of general sewing techniques is required)
  • Scissors 
  • Hot glue gun
  • Hot fix crystal applicator (Mine is Made by Darice - see links)
  • Cotton print fabric at least 26 inches by 24 inches (see links)
  • Black lace fabric about 2 inches by 2 inches (see links)
  • Mastex thread (available through Edinburgh Imports-see links)
  • Two approximately 1" sturdy buttons JoAnn's or Walmart)
  • One 5" sculpting needle
  • One package of 7 mm rick rack in black
  • Size 16ss olive or black hot fix crystals (see links)
  • Elmer's Spray Adhesive
  • Hot Glue sticks
  • Five green Millinery leaves approximately 3 inches long by 2 inches wide (easily found on Ebay)
  • Lime green ultra fine glitter (available at many craft stores)
  • Polyfil stuffing 
  • One 4 inch beveled wood base (bought mine at JoAnn's but not online)
  • Black acrylic craft paint
  • Paint brush
  • Matte Interior Varnish by Delta Ceramcoat
  • Glamour Dust (glitter paint) Black Ice by DecoArt, sent to me by my swap box pal LeeAnn, and found at Micheal's  
  • Sewing Machine
  • Fabri-tac fabric glue
  • Large Books (to hold weight in place Step 20)

Yours Always,

Carly Anne

HURRY! Last Day for Giveaway


Folkart and Primitives


Hi Folks!  I just joined a wonderful group of girls on the Etsy Team FAAP (Folk Art And Primitives)  They have been having a Giveaway and today is the last day to sign up!  Sorry not to have told ya'll earlier, but I'm just learning my way around this team.  Also to see  their works for sale on Etsy, just put FAAP in the search box and the listings will just POP up!  Be Ready for some serious "EYE CANDY"!!! 

Please follow this link to the Giveaway!

http://folkartandprimitives.blogspot.com/2013/07/faap-summer-time-giveaway.html

Thursday, July 25, 2013

My Art Doll Quarterly Arrived!!!


Cecil the Crow
My Art Doll Quarterly is here!!!  My Dolls are in there not once but Twice PG. 10 and pg 69!!! OH HAPPY DAY!  Just a Dream come true! (doing a little dance).  Some of you out there may already have yours...let me know what you think. I know I am jumping up and down...but it is truly an elated and humbling experience all at the same time (emotional soup)! Being alongside of so many great artists in this issue...I can only hope that my article measures up to peoples expectations.  My thought in writing it was to share some of what I've learned over time by trial and error and sometimes by accident. My hope for you is that you learn a little something new and come away with ideas that inspire you!  

Also in this issue, my very dear friend, LeeAnn Kress of Charmed Confections  http://charmedconfections.blogspot.com/  , has FIVE of her wonderful dollies published!  I know ya'll will enjoy seeing them (beginning on pg 104)! 

Here are some additional pics of my featured dolls for your viewing pleasure...hope you enjoy!

Garret O'Skullivan


Tomas the Cat


Jeremiah the Frog


Samuel


Love,

Carly


Friday, July 19, 2013

Marguerite in the Movies!

Hi everyone!  Just wanted to share Marguerite's movie with you. My youngest son made it for me.  She will be in Art Doll Quarterly this August!


 I want to thank all of you for following me...we are going great places together! Please look for me in Stampington's Holidays and Celebrations Fall Issue due out September 1st and also Somerset Studios Fall Issue!

Love and Friendship,

Carly

Saturday, July 13, 2013

New Listings on Spookytime Jingles

Hi Everyone!

Just a little note to let everyone know that Spooky Time Jingles updated last night and new artwork is posted!!!!  Here is my latest offering...Orville the Pumpkin Head!

Please go to http://www.spookytimejingles.com/  to view his full description! 


Orville

Love Always,

Carly

Monday, July 8, 2013

Sneak Peak...FreeTutorial!

Here is a picture of the Pumpkin in my FREE Tutorial beginning August 1st at Boggy Bottom Bayou! It will begin the same day that the Fall Issue of Art Doll Quarterly hits the streets!  You will be learning how to make Marguerite's Pumpkin appearing in this issue!  Marguerite is my Bird Cage Doll.  Also appearing this issue are 5 new dolls and my article on embellishments.  All of this ties in together, so be sure not to miss either one!

The Three Amigos Look On!


Love and Friendship Always,

Carly

Saturday, July 6, 2013

Pumpkin Tutorial Coming In August!!!

Come see and take my Pumpkin Tutorial mentioned in the Fall Issue of Art Doll Quarterly!!!  I'll teach you to make the same pumpkin as seen inside the cage of My Bird Cage Doll Marguerite. 


Here is a close up of the type of pumpkin we will be making!


The techniques you will learn will help you to embellish just about any project!

Love Always,

Carly

Saturday, June 29, 2013

Art Doll Quarterly Preview!


Well…Great News!  Stampington has posted a preview of their eagerly awaited Fall Issue 2013!!! It even shows eight great pages from this Issue (due to hit the newsstands August 1)!  Below is a picture of the Cover and a picture of the Table of Contents.  Guess whose dolls are pictured twice???  Mine!  I’m so excited!  My happy frog doll, Jeremiah is at the top on the left, and my cage doll Marguerite is down second to the bottom on the right!  Here is the link to go to the ADQ Preview page and see the rest of the preview:


 My Dear, Dear, Friend LeeAnn Kress, of Charmed Confections, is represented by her darling little Cyclops, right below Marguerite!  Congratulations LeeAnn!  Heard it through the Grapevine that five of her wonderful dolls will be in this issue! 

Please be sure to see my article “The Bling Factor” featuring my newest dolls and Marguerite, my light-up Cage Doll!

Warmest regards,

Carly


Wednesday, June 12, 2013

A New Addition to Our Family

I know I promised to blog more often…I will try to make up for it with a little long and personal post.  A lot of you may be aware that in the last five years, I had 5 major surgeries and kinda let myself go.  I also cracked my head open, broke my collar bone and my left thigh bone twice.  No one wants to be near me in a lightning storm!!!  It has been hard on the Boggy Bottom family as well as myself.  My sons and my Husband have dealt with a lot and supported and loved me all the way. I am so very thankful for them. I don’t know what I would have done if they had not shown such strength and love through it all…but I am not writing this so ya’ll feel sorry for me…I want you to share in my joy!

A few months ago, a young man named Mark, who we knew very well as one of Matthew’s best friends lost his family.  I am proud to say he has accepted us as family and we, him!  He is now with us in our home, his home, and doing very well in college while holding down a part-time job.  His interests are Zoology, Falconry (how he met Matthew in the first place), motorcycles and he has many more diverse interests I never knew. He recently turned 21. I always wanted another son and now I have one! Please welcome our third Son, Mark. 

I am especially thankful for his interest and determination to see me on my feet again.  He has really made more difference in my rehabilitation from the two leg surgeries and being able to walk again than any physical therapist I’ve ever had.  Please excuse me if you don’t see and haven’t seen as many posts of new dolls as I have been busy spending time with my newest son and getting to know him better.  He is truly a gift from heaven and a breath of fresh air to this Mama!!! 

His Future's So Bright, He Has to Wear Shades!!!

Thursday, May 16, 2013

Back to work!

Well everyone ...I just returned home with my Husband from Colorado and seeing my eldest son, Allan graduate with his Masters in engineering from CU at Boulder!!! Please see left side panel for details!

I have not blogged recently and I apologize...been real busy writing my article for Art Doll Quarterly Magazine as I will be featured in their Fall Issue due out August 1st!  I'm so very excited to be chosen by them two years in a row!!!!  Tomas, the cat, is pictured below and will be one of six of mine featured!!!


In addition, Marguerite, my Bird Cage Doll will be in their Gallery of Show and Tell.  That's not all...I have a line of ornaments and they will be the subject of a feature article in Celebrations & Holidays coming to a book or craft store near you Sept. 1.!!!  Wow...I will have writer's cramp!

Important Notice!!!

We will be having another 'blog hop' in August!  It will be a Fall/Halloween event with more prizes and more chances to win!

Tutorial coming too in August...How to make a lace covered and crystal embellished Pumpkin....you will learn new technique,  perfect some old ones and end up with a "Great Pumpkin"!!  

More details to come!!!!  Stay tune!!!d!!!  The Autumn Season will be heating up!!!


Tuesday, April 2, 2013

FREE Tutorial!!!

My Dear Friend, Lee Ann Kress of Charmed Confections is giving a tutorial tomorrow Here is what she says and a picture of what you will learn how to make!!!! Free Tutorial!! Candy Anyone?


Hi!

Thought I would post a picture of what will be needed in my first tutorial on how to make miniature candy / candy ornaments (like the ones I made for the Christmas Blop Hop Giveaway). I will be posting a tutorial on how to make faux candy next Wednesday. I would love for you to join me! Making sweets should be made together, so don't leave me here in my craft kitchen alone. 

 See below and go to http://charmedconfections.blogspot.com/


Below is a picture of what I will be showing you how to make, as well as giving you lots of variations, such as embellishments, like buttons, garland, Christmas ornaments, etc. Lots of possibilities with these sweet candies.


Have Fun Everyone!!!

Sunday, March 24, 2013

Some new Works in Progress!

Here is what I've been up to since Marguerite left for her audition at Art Doll Quarterly!


I wanted to name her "Moaning Lisa"...but she's looking more like a 'LaLa
Lola"...any suggestions?


Here we have A Squash named "Solange"


You probably guessed it...they are also going to be cage dolls!

Yours Aways,

Carly

Another Marguerite Photo OP


Before


Well, I promised to keep putting up more pics of Marguerite...I think you'll like these!  They include some of her "Before" photos.


After


Monday, March 18, 2013

Marguerite Goes Sepia

Here are some pictures that show an interesting function on. my camera 


 It makes her look so old fashioned! Kinda like one of those civil war tin type photographs...hope ya'll like them!


All my Best,

Carly

Saturday, March 16, 2013

More on Marguerite


I have some more pictures to share with you and tell you a little about each one.

When I first was imagining Marguerite,  I did not see her wearing a hat...but it became evident that she would not have a complete outfit without it.  I've never before covered my pumpkin dolls head...just let the stem be natural. I thin it works on her.

I


Wednesday, March 13, 2013

Marguerite Screamer Guavaween/Halloween Queen


Well folks...She is finished!!!  I'm sorry I didn't keep up with my posting as I had planned..I've just been so busy meeting deadlines, I never came up for air!  My family looked out for me and did all my other chores and I just kept working!

Here is a special treat that my son,s friend Mark made for me....didn't he do a great job?!