Saturday, April 29, 2017

Just a little update on some other dolls that I shared on FB.

Just a few updates to keep you up with these two ladies I'm making...different than my usual, but pure fun...feel like I'm playing dollies again in grade school! The red head's body is jointed and ready for stuffing!


I will post some more tutorial as soon as I am thru with my ADQ article.

See you soon!

Carly

Monday, April 24, 2017

#4 ONWARD...This is Important!


Getting into the nitty, gritty part!


\

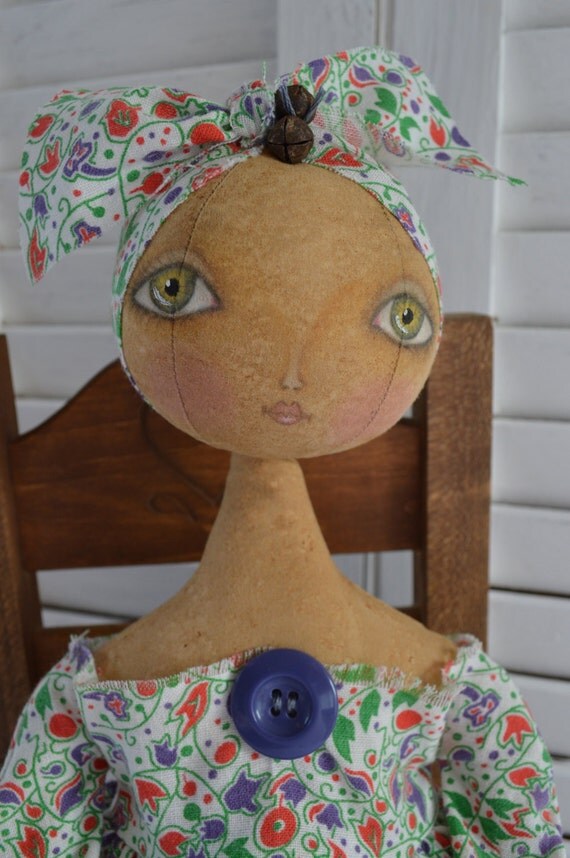
The spool on my right is very strong Mastex thread...I've had it forever and it is strong!  Unforunatly, I read that they stopped making it...just use your strongest thread you have and it should be fine...you are not going to pull very hard.  take your thread and go into the middle of the eye (you will need a 3"sculpting needle) go back and forth between the eyes keeping gentle tension on the thread. The doll should look like the picture below.


Here, if you look closely, you can see where the strong thread pulls the center of the eye inward or concave, but not so severe that you wrinkle the fabric around the eyes. This will give more dimension  to the


                                                                                                             Now,without harming the thread in the eyes, pierce the middle of the green iris and remove. These holes will be used to set the shank of the eye. These are glass eyes made in Germany and have a wire loop on the back. you will also need artificial sinew and it is waxy feeling, also called eye floss.  If you can't buy it online, you might try waxed dental floss...very similar!

Next, thread the loop on the eye (no needle needed) and even the two ends of the floss.  Then thread them together through your 3" needle.

Take the needle and thread and insert, pull through until the eye stops you. To get the loop embedded into the face, you may  have to adjust your hole a little or gently squeeze the wire loop til it is a bit narrower.


here you can see that I always pull my threads to the bottom so they won't show after being knotted.


Repeat on the other side.


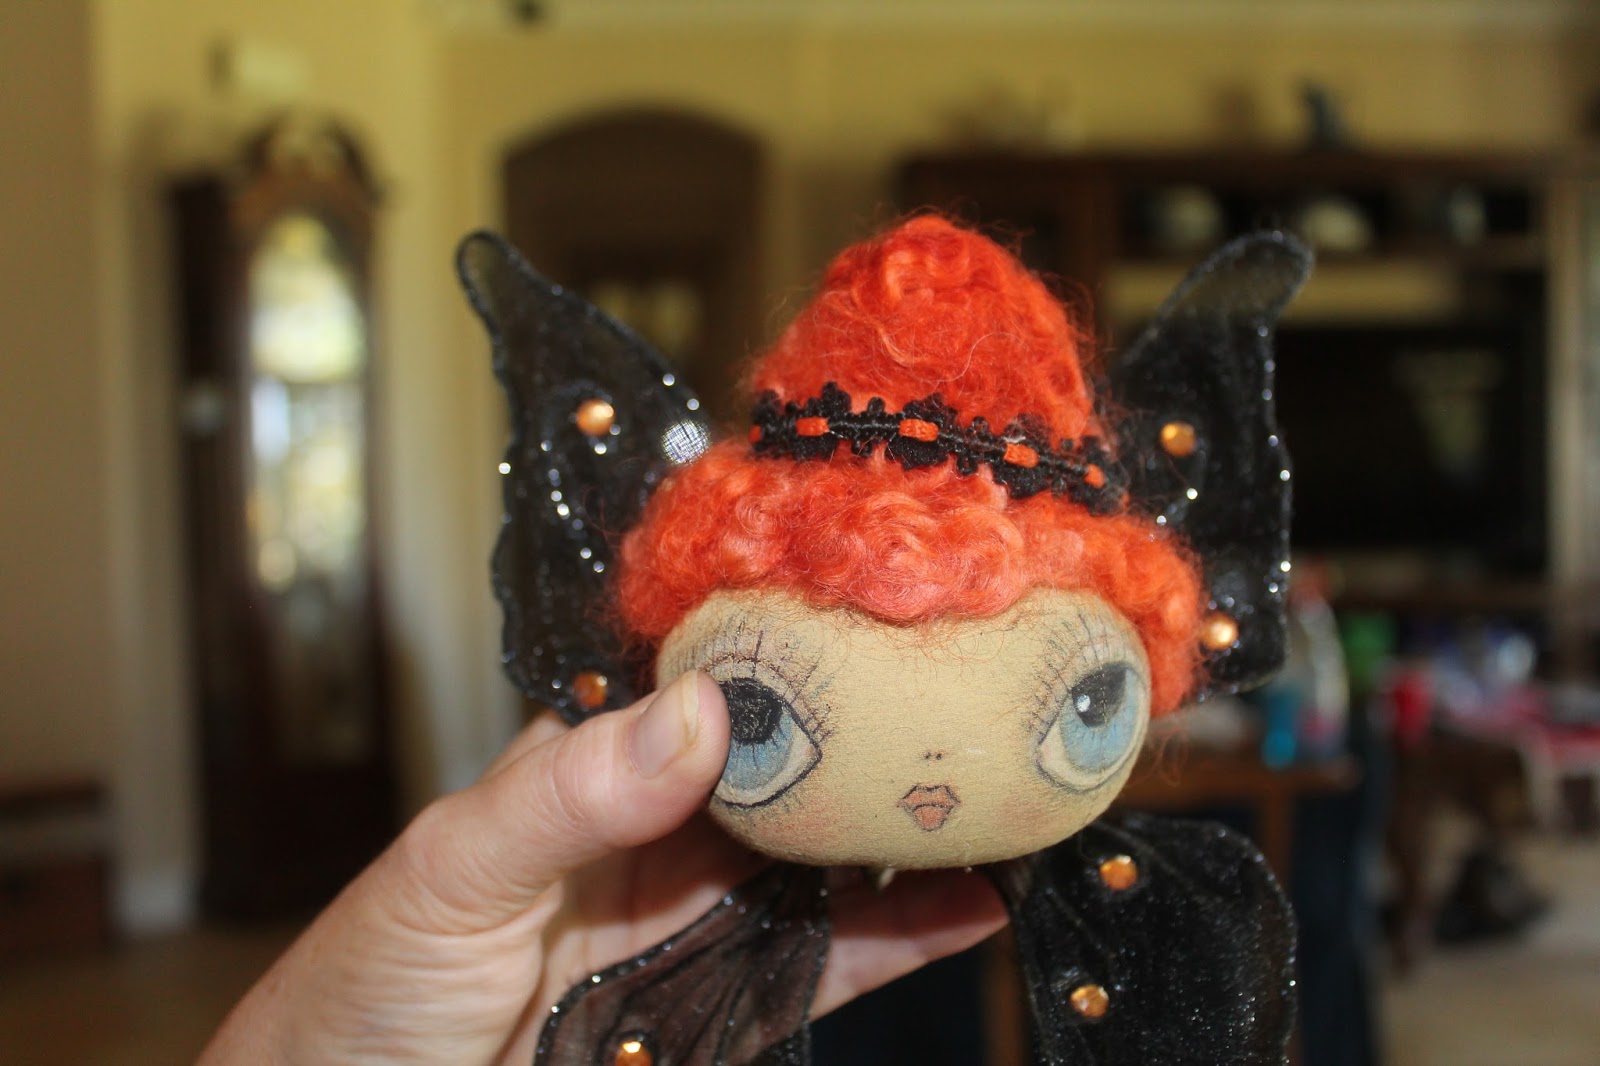
These are extra pics that will help if you have never used glass eyes.

ONWARD!  


Til next time,

My Best Always,

Carly

Saturday, April 22, 2017

Mini Lecture on eyes! The eyes Have It!

Mini Lecture

Eyes are, in my mind,the most important part of the face..."windows" to the soul if you want to be romantic about it....and,I do...LOL!  I work the very hardest on learning to do eyes better and better! There are two very good tutorials that I learned a lot from were Brenda Jett Sanker's "It's all about the eyes." Available in her Etsy Shop. She , as you can see by the phenomenal eyes she paints!   Another good one is by Karen McCann of Cheesecreek Primitives and she uses  colored pencils! I use a mix of paints and pencil...start off with these tutorials and you won't be lost in "eye land" like I used to be! I have known Brenda for many years and Karen is a fairly new friend. she makes a lot of things, make sure you see her dolls like the one below. Go meet these peeps...they are that good, an eye specialist! In primitives..who would have thought?  Etsy Stores are:

https://www.etsy.com/shop/brendasanker?ref=l2-shopheader-name

https://www.etsy.com/shop/CheeseCreekStudio?ref=pr_shop_more


Brenda Jett Sanker Primitive Folk Art Dolls: EPatterns:
Brenda Jett Sanker


Primitive Folk Art Doll Pattern - ePattern - Cheese Creek Studio Original Design
Karen McCann
'OK this little post is just preliminary learning for the face...Always research, study and blend your own style from working in different mediums..


Til next time!

My Best Always,

Carly

Friday, April 21, 2017

A quick note.......


So sorry I'm running behind...had to run to the hospital , but everything is OK now and I should have the next lesson up sometime today...Pica are taken, just need to narrate them!

See ya'll later today,

Carly💓

Tuesday, April 18, 2017

Happy girl! Being Published!


Published!

I'm interrupting class for an important announcement!

Well...I think if I didn't say it here, I would be remiss.....My dolls, Harley and company made it into Art Doll Quarterly!  I can't believe...they had no bling like usual...truth is....I couldn't find (still looking) all my bling supplies.  So I did not embellish them as usual...I decided to try a more plain and simple look...and you know what, I may not always leave my "bling" behind, but I think I will continue to add these simple dolls...it was fun! 

The Magazine hits the shelves August 1st at Barnes and Noble, other book stores and craft stores around the country. You may also subscribe directly to the magazine at Stampington.com


n


Hershal will be there along with 5 more creations from me!  If I'm a little slow in getting up posts, its only because I have to have Art Doll's article to them by May 1!

More doll teaching coming up and we will take her all the way to this level!


Soon...please comment and let me know how this is working..

My Best Always,

Car;y.


Sunday, April 16, 2017

Installment #3  We Get to Color in the Lines!


Back again....!

The Nose

I just drew this up real quick sketch for some basic noses that look good on this kind of Prim.  I you have a special nose, please share it with us...you can send it in an email to me at carolynsmith906@gmail.com and I will share it here. 


The first nose on the left is an old fashioned nail stitched twice to the face. The two middle ones are similar to the one on our dollies face.  Take your dark brown Prismacolor watercolor pencil (dry,not wet.) and color in the nose cleanly within the lines.  Sometimes it is nice to color rather than paint, and these pencils do the job! Last, but not least is the felt stitched nose...let me go dig up an old pic to show you....be back!  

I'm back!  Here he is with his stitched felt...this is a throw back to 2007-2010! 


I like to start playing with different hair even before the pencil lines are drawn!  Then ,off an on throughout the project to get a feeling of who this young girl is. Just hold it up to the head and face and check to see if the texture, curl (or lack of it), and color complement the dolls face.  I don't think this is her best color! LOL!


The screw hanging from the bottom of the head is part of her neck joint.  I use sturdy nuts and bolts to make many of my dollies.

Looking Pretty Good!


Okie Dokie..done for now.....or so I thought...I forgot I promised the cheeks...Here goes...


This paint is my favorite for blushing cheeks...it  goes with red and will go great with all Halloween colors,nicely muted.


Use very little paint...we are going to dry brush the cheeks.


Brush off most of your paint on a paper towel...make sure it is very light before going to your dollie.  You can always add more blush,but you can't take it away after it is on the face!


Apply to the cheek area in light circular motions


OK...now we are done for today...I think

My Best Always,

Carly

Saturday, April 15, 2017

Lesson 2 Prim Dollie- Lets get busy!


Lets Get Busy!!!


Being new at this...I didn't think to get pics of me painting....oops...try to keep a clean line between colors unless you decide (the artist from within your soul!) to change it up a little. Use any eye color you like, but it is hard to accent a very dark color.  I chose this green, because next doll will have blue eyes and be Patriotic.  I never use a bright white...its just not Prim!


F
For this small, but important step, I used a flat brush 
#6 by Donna Dewberry. 


 When painting with it I, I lay the paint down next to the line and kinda, while controlling the amount of paint that slides with the brush,edge the border with the appropriate color. Allow to dry in between colors. .


I often am in a hurry or just want it right then (ever feel that way?) I'll throw her into the oven for 15 min. then retrace your nickle on the white eye and paint green. 


***Tip Time***
My finer is pointing at the Left Head Seam. I pretty much lay the middle of the eye on this seam .  I do this Left and Right.  I will also mark on my eye template where the seam meets the eye in order to use the template for more dolls.

Now, let the green paint dry.......


And...We are ready to sand!  A key element to Prim faces!  Sanding will not only help "age" your doll, it helps the stain penetrate the paint to darken the whole eye by a shade or two...If you ever you a spray, the process is a little different and I can always (if anyone is interested) teach how to use spray stain and what brand and why.  So here is where you would "Prim stain" your head as it is.

This is a very light grit on a sanding sponge I purchased from Kemper Dolls. Sand over the eye softly until you have removed the desired amount of paint from the fabric. Can you now see the fabric weave a little exposed?  Extreme Prims will want to sand a bit more to take up more of the dark, grungy stain we all can't live without!!! Stain and let dry...mine isn't stained yet, cuz I'm 'doin this!  I'll show a picture next time.


Well, I think I covered it all except about the "slant" of the eye when you first draw it...We will start there next time as it opens up the subject of "Expression"

Well, I need to go work on my article for Art Doll Quarterly!  See you soon,

My Best Always,

Carly

First Installment On My Blogg Plan..A Prim Cloth Doll


1st Installment: Prim Cloth Doll


Hi everyone...please bare with me...I know I'm not live (we are thinking about doing some video here too) but for some strange reason I'm feeling a little stage fright......here goes...


F-1

Here, I have made a template out of paper in the shape and size that I want the eyes. I used a nickle to make my circle or you may free-hand it..


F-2

.I like a nice clean circle, so I trace it onto the doll with a #2 pencil.  


Fig 3

The great thing about a pencil, is, that if you don't like it, you can usually erase it off the head at least once and not ruin the head.

***TIP***

If you screw up totally, just turn your head around and start over on that side!  Cover the bad side with hair (easily cover the pencil lines) and you are set!  What mistake???  HeHe  Besides, this can be a Mommy doll with "eyes" in the back of er head!  Yes...I am very corny!


Well I kept this short for my 1st time...just figuring it all out...if you haven't had enough, please go to my friends blog: http://willowhollowcreations.blogspot.com/  Susie Kirchbaum will be doing the same thing.  We also plan to show you our "BLOOPERS" and how we fixed them...or not!

My Best Always,

Carly


t


Friday, April 14, 2017

2nd Fiddle? No More!!!


HI there...whoever still sees me here...I have a message.....I guess sometimes Facebook just rolls too fast for me and I have to get out of there fast lane and do some blogging...I love my FaceBook friends, many whom I've meet at shows...lovely people, all of them, I sometimes come here and just look at my blog...the images, colors are all soothing to me and soothes my soul. More relaxed here...so here is were I'm going to teach...Maybe you will want to follow along as I make my dolls, I will not be throwing pictures up to blog nothingness....I plan to start giving progress reports with pictures of dolls I am working on.

It is an ongoing tutorial in which you will learn my tips,tricks, (the real trick is that there are none) it is just my way of doing things.  I will post on facebook still, but the guts will be here...sometimes in between teaching or at the end of it. I don't know yet...This is a process and I'm new to it too! I just don't want the blog I've worked on so hard, to play second fiddle anymore!  That's my speech. Amen.

My best Always