Installment #3 We Get to Color in the Lines!
Back again....!
The Nose
I just drew this up real quick sketch for some basic noses that look good on this kind of Prim. I you have a special nose, please share it with us...you can send it in an email to me at carolynsmith906@gmail.com and I will share it here.
The first nose on the left is an old fashioned nail stitched twice to the face. The two middle ones are similar to the one on our dollies face. Take your dark brown Prismacolor watercolor pencil (dry,not wet.) and color in the nose cleanly within the lines. Sometimes it is nice to color rather than paint, and these pencils do the job! Last, but not least is the felt stitched nose...let me go dig up an old pic to show you....be back!
|
I'm back! Here he is with his stitched felt...this is a throw back to 2007-2010!
I like to start playing with different hair even before the pencil lines are drawn! Then ,off an on throughout the project to get a feeling of who this young girl is. Just hold it up to the head and face and check to see if the texture, curl (or lack of it), and color complement the dolls face. I don't think this is her best color! LOL!
The screw hanging from the bottom of the head is part of her neck joint. I use sturdy nuts and bolts to make many of my dollies.
Looking Pretty Good!
Okie Dokie..done for now.....or so I thought...I forgot I promised the cheeks...Here goes...
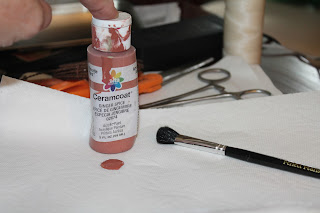
This paint is my favorite for blushing cheeks...it goes with red and will go great with all Halloween colors,nicely muted.

Use very little paint...we are going to dry brush the cheeks.
Brush off most of your paint on a paper towel...make sure it is very light before going to your dollie. You can always add more blush,but you can't take it away after it is on the face!
OK...now we are done for today...I think
My Best Always,
Carly


No comments:
Post a Comment