Sunday, April 16, 2017

Installment #3  We Get to Color in the Lines!


Back again....!

The Nose

I just drew this up real quick sketch for some basic noses that look good on this kind of Prim.  I you have a special nose, please share it with us...you can send it in an email to me at carolynsmith906@gmail.com and I will share it here. 


The first nose on the left is an old fashioned nail stitched twice to the face. The two middle ones are similar to the one on our dollies face.  Take your dark brown Prismacolor watercolor pencil (dry,not wet.) and color in the nose cleanly within the lines.  Sometimes it is nice to color rather than paint, and these pencils do the job! Last, but not least is the felt stitched nose...let me go dig up an old pic to show you....be back!  

I'm back!  Here he is with his stitched felt...this is a throw back to 2007-2010! 


I like to start playing with different hair even before the pencil lines are drawn!  Then ,off an on throughout the project to get a feeling of who this young girl is. Just hold it up to the head and face and check to see if the texture, curl (or lack of it), and color complement the dolls face.  I don't think this is her best color! LOL!


The screw hanging from the bottom of the head is part of her neck joint.  I use sturdy nuts and bolts to make many of my dollies.

Looking Pretty Good!


Okie Dokie..done for now.....or so I thought...I forgot I promised the cheeks...Here goes...


This paint is my favorite for blushing cheeks...it  goes with red and will go great with all Halloween colors,nicely muted.


Use very little paint...we are going to dry brush the cheeks.


Brush off most of your paint on a paper towel...make sure it is very light before going to your dollie.  You can always add more blush,but you can't take it away after it is on the face!


Apply to the cheek area in light circular motions


OK...now we are done for today...I think

My Best Always,

Carly

Saturday, April 15, 2017

Lesson 2 Prim Dollie- Lets get busy!


Lets Get Busy!!!


Being new at this...I didn't think to get pics of me painting....oops...try to keep a clean line between colors unless you decide (the artist from within your soul!) to change it up a little. Use any eye color you like, but it is hard to accent a very dark color.  I chose this green, because next doll will have blue eyes and be Patriotic.  I never use a bright white...its just not Prim!


F
For this small, but important step, I used a flat brush 
#6 by Donna Dewberry. 


 When painting with it I, I lay the paint down next to the line and kinda, while controlling the amount of paint that slides with the brush,edge the border with the appropriate color. Allow to dry in between colors. .


I often am in a hurry or just want it right then (ever feel that way?) I'll throw her into the oven for 15 min. then retrace your nickle on the white eye and paint green. 


***Tip Time***
My finer is pointing at the Left Head Seam. I pretty much lay the middle of the eye on this seam .  I do this Left and Right.  I will also mark on my eye template where the seam meets the eye in order to use the template for more dolls.

Now, let the green paint dry.......


And...We are ready to sand!  A key element to Prim faces!  Sanding will not only help "age" your doll, it helps the stain penetrate the paint to darken the whole eye by a shade or two...If you ever you a spray, the process is a little different and I can always (if anyone is interested) teach how to use spray stain and what brand and why.  So here is where you would "Prim stain" your head as it is.

This is a very light grit on a sanding sponge I purchased from Kemper Dolls. Sand over the eye softly until you have removed the desired amount of paint from the fabric. Can you now see the fabric weave a little exposed?  Extreme Prims will want to sand a bit more to take up more of the dark, grungy stain we all can't live without!!! Stain and let dry...mine isn't stained yet, cuz I'm 'doin this!  I'll show a picture next time.


Well, I think I covered it all except about the "slant" of the eye when you first draw it...We will start there next time as it opens up the subject of "Expression"

Well, I need to go work on my article for Art Doll Quarterly!  See you soon,

My Best Always,

Carly

First Installment On My Blogg Plan..A Prim Cloth Doll


1st Installment: Prim Cloth Doll


Hi everyone...please bare with me...I know I'm not live (we are thinking about doing some video here too) but for some strange reason I'm feeling a little stage fright......here goes...


F-1

Here, I have made a template out of paper in the shape and size that I want the eyes. I used a nickle to make my circle or you may free-hand it..


F-2

.I like a nice clean circle, so I trace it onto the doll with a #2 pencil.  


Fig 3

The great thing about a pencil, is, that if you don't like it, you can usually erase it off the head at least once and not ruin the head.

***TIP***

If you screw up totally, just turn your head around and start over on that side!  Cover the bad side with hair (easily cover the pencil lines) and you are set!  What mistake???  HeHe  Besides, this can be a Mommy doll with "eyes" in the back of er head!  Yes...I am very corny!


Well I kept this short for my 1st time...just figuring it all out...if you haven't had enough, please go to my friends blog: http://willowhollowcreations.blogspot.com/  Susie Kirchbaum will be doing the same thing.  We also plan to show you our "BLOOPERS" and how we fixed them...or not!

My Best Always,

Carly


t


Friday, April 14, 2017

2nd Fiddle? No More!!!


HI there...whoever still sees me here...I have a message.....I guess sometimes Facebook just rolls too fast for me and I have to get out of there fast lane and do some blogging...I love my FaceBook friends, many whom I've meet at shows...lovely people, all of them, I sometimes come here and just look at my blog...the images, colors are all soothing to me and soothes my soul. More relaxed here...so here is were I'm going to teach...Maybe you will want to follow along as I make my dolls, I will not be throwing pictures up to blog nothingness....I plan to start giving progress reports with pictures of dolls I am working on.

It is an ongoing tutorial in which you will learn my tips,tricks, (the real trick is that there are none) it is just my way of doing things.  I will post on facebook still, but the guts will be here...sometimes in between teaching or at the end of it. I don't know yet...This is a process and I'm new to it too! I just don't want the blog I've worked on so hard, to play second fiddle anymore!  That's my speech. Amen.

My best Always

Saturday, March 25, 2017

UPDATE: Work In Progress , Harley the Pumpkin Head!


And here he is!


Here is the old Codger who is listening to MELBA and the latest gossip....he is hard of hearing....how could he hear well? He has no ears!


see you soon....

My Best always!

Carly

Friday, January 20, 2017

OOPS!!! I haven't Caught Up!


OOPS!!!  I haven't Caught Up!


Well, if there are any blog lovers out there...I apologize...I haven't posted every post by me here and I should...I will catch up here and try to do better! Here they are in order of posting...please enjoy!


Post 3)


 Here is a work in progress I have been busy on...my son taught me a new stain technique which is not so harsh and gives a little softer distress...


I weakened the stain a bit and went in sections...much easier to control! A few more tweaks and she'll be ready for a hat


She needs a hat and hair...what kind...thin? curly? big hat ...little hat...decisions must be made...any ideas?


Post 2) Here is another WIP, she is just a big gossip!!! Anybody got a name...?


 Post 1)
 Here is another that has escaped, from where..?.I don't know...yes, he needs his other ear...had to leave for Holidays and will have to add it shortly! For Now I will just call him "VINCENT". LOL!


Wednesday, January 4, 2017

Look what my hands made! New Doll!


Look what my hands made!  New Doll!


While playing around with expressions and working on improvement of my artwork (my happy place) this guy came out....he kinda scares me! I was going for old....his smile will show up more when painting him...what do you think?


 Very different than the usual.......


I hope he looks old and kind......have to figure out how I want to paint his eyes...


I have a couple more....Hmmmmm...I don't know what to call them...how about "My Uglies!

Well, I try to add more tomorrow....

My Best 
Always

Carly

Tuesday, December 20, 2016

Published Pumpkin Head Doll

Stan the Pumpkin Man


Here is another guy going into my Etsy Shop:

 https://www.etsy.com/shop/BoggyBottomBayou?ref=hdr_shop_menu


Stan the Pumpkin Man
by Carly Smith
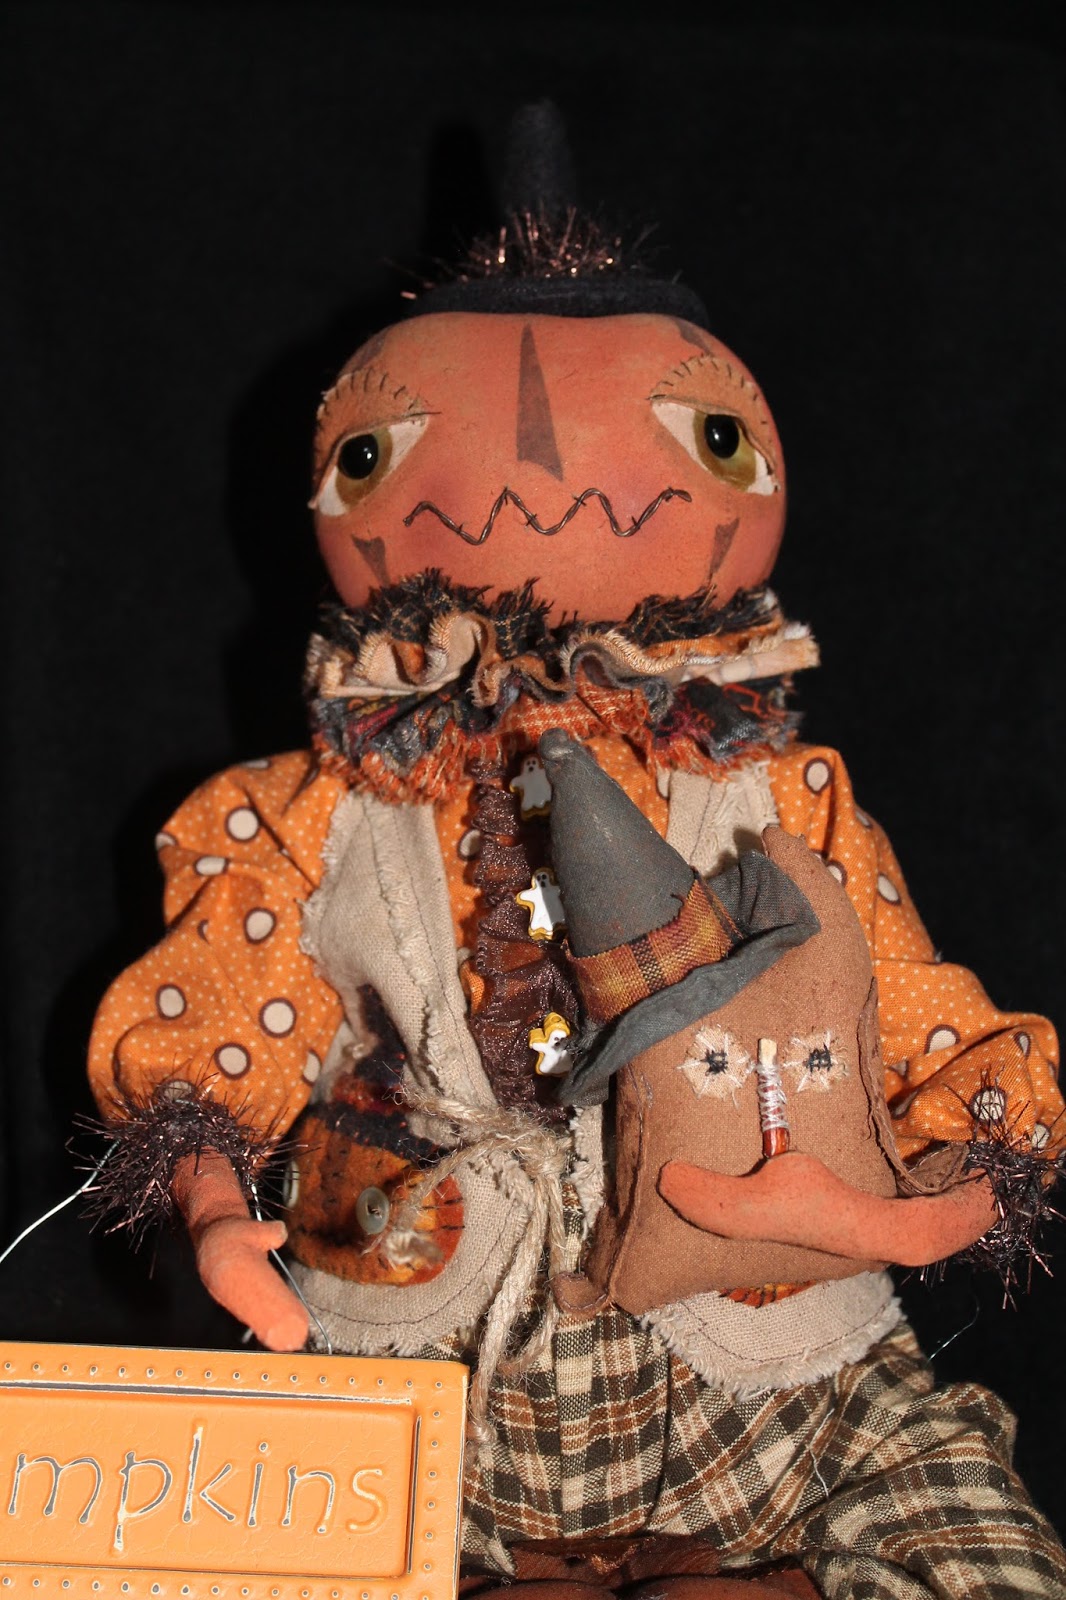
Stan is soft a sculpture doll.  He stands 20 inches tall and about 11 inches when sitting.  His little head is soft sculpted into a pumpkin shape and he wears a small felt hat embellished with vintage style tinsel. His facial features are hand painted and his eyes peek out through glass pupils of highest quality and made in Germany.   His body is made of tea stained muslin that has been stuffed and weighted as he is a shelf sitter. 

Stan is a jointed doll in the same fashion that Teddy Bears are jointed. There are five moveable joints allowing him to be placed in many positions. The head, both arms and both legs are fitted with durable fiberboard discs using the lock nut system for jointing.


 His arms are colored with acrylic paint and are lightly wired for posing and holding very light objects. In addition to being jointed, legs are wired too and are very helpful in posing him in multiple sitting positions. His weighted bottom also assists him to remain balanced when sitting. Sometimes, during shipping, the weight bag inside may shift a little and one may have to set the doll down with a little “thump” or “bump” to his bottom to reposition the weights.


His shirt is fashioned from tea stained orange polka dot print fabric.  He wears a colorful ruffled, five layered collar around his neck. He wears a vest made of stained prim osnaburg fabric that has been embellished with hand appliquéd jack o lanterns in much the same fashion as a penny rug. His black and tan checked pants are fastened with a simple jute twine.
Stan sits perched on one of my large prim pumpkins and has two little owl friends that I picked up at a craft show some time ago so the crafter is unknown.

Stan may go home with you for an adoption fee of 225.00.  Travel fare is 15.00


My Best Always,

Carly


Wednesday, December 14, 2016

Caleb the Scarecrow is here for sale! Published in Prims 2015


Caleb

Hi Ya'll!  Carly here again and I have with me, one of my favorites!  His name d hr is my first is Caleb and he will be for sale in my Etsy Shop, so come on over to see him later tonite.  In the meantime, if you are interested,just email me at carolynsmith906@gmail.com 

Caleb the Scarecrow
By Carly Smith


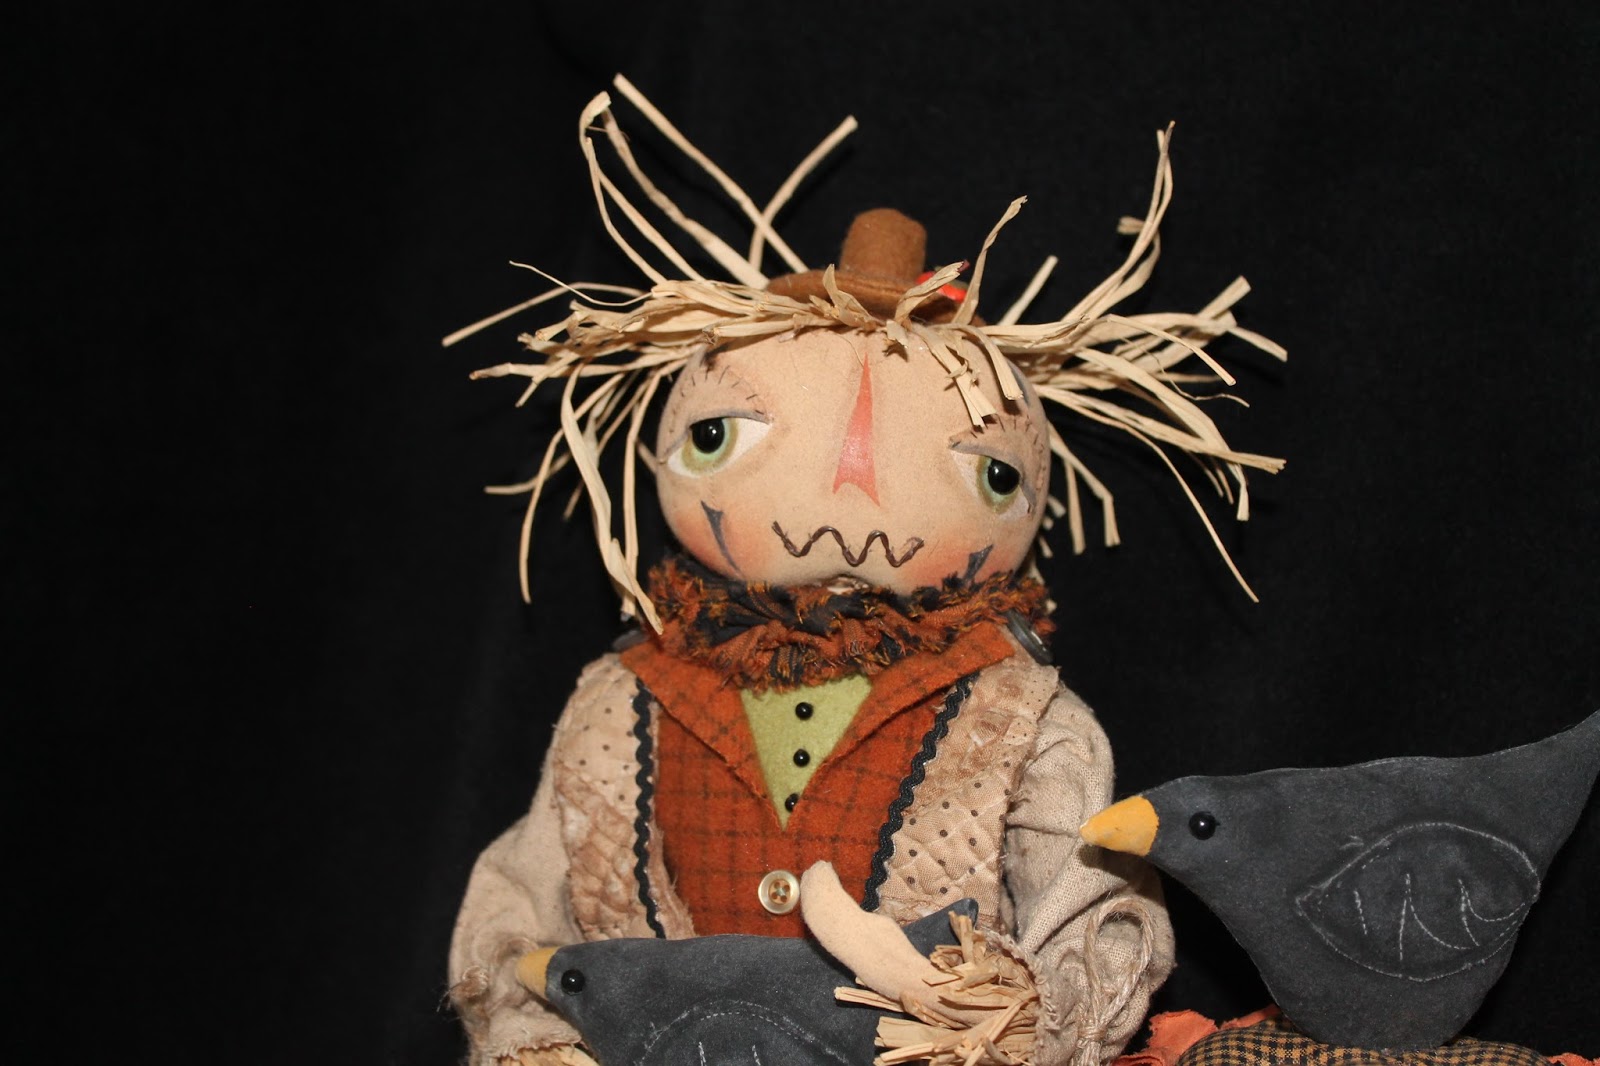
Caleb is soft a sculpture doll.  He stands 20 inches tall and about 11 inches when sitting.  His head is fashioned as a scarecrow with raffia hair  Caleb’s  His facial features are hand painted and his eyes peek out through glass pupils of highest quality and made in Germany.   His body is made of tea stained muslin that has been stuffed and weighted as he is a shelf sitter. Caleb is a jointed doll in the same fashion that Teddy Bears are jointed. There are five moveable joints allowing him to be placed in many positions. The head, both arms and both legs are fitted with durable fiberboard discs using the lock nut system for jointing.


 His arms are colored with acrylic paint.  They are lightly wired for posing and holding very light objects. In addition to being jointed, legs are wired too and are very helpful in posing him in multiple sitting positions. His weighted bottom also assists him to remain balanced when sitting. Sometimes, during shipping, the weight bag inside may shift a little and one may have to set the doll down with a little “thump” or “bump” to his bottom to reposition the weights.


Caleb’s shirt is fashioned from tea stained osnaburg fabric.  He wears a vest made of recycled quilt with hand appliquéd pumpkins and a layered sweater look underneath. He wears a colorful ruffled, five layered collar around his neck.  His black and tan checked pants are fastened with a simple jute twine.
Caleb comes with several accessories.  I made his prim sunflower and his two pet crows are from Hilltop Homesteader by Pam Doyle.


Caleb may go home with you for an offering of 195.00 plus 15.00 travel fare


My Best Always,


Carly

Billy Ghost

Billy Ghost for Sale Published in Somerset Studio Gallery 2015


Billy Ghost
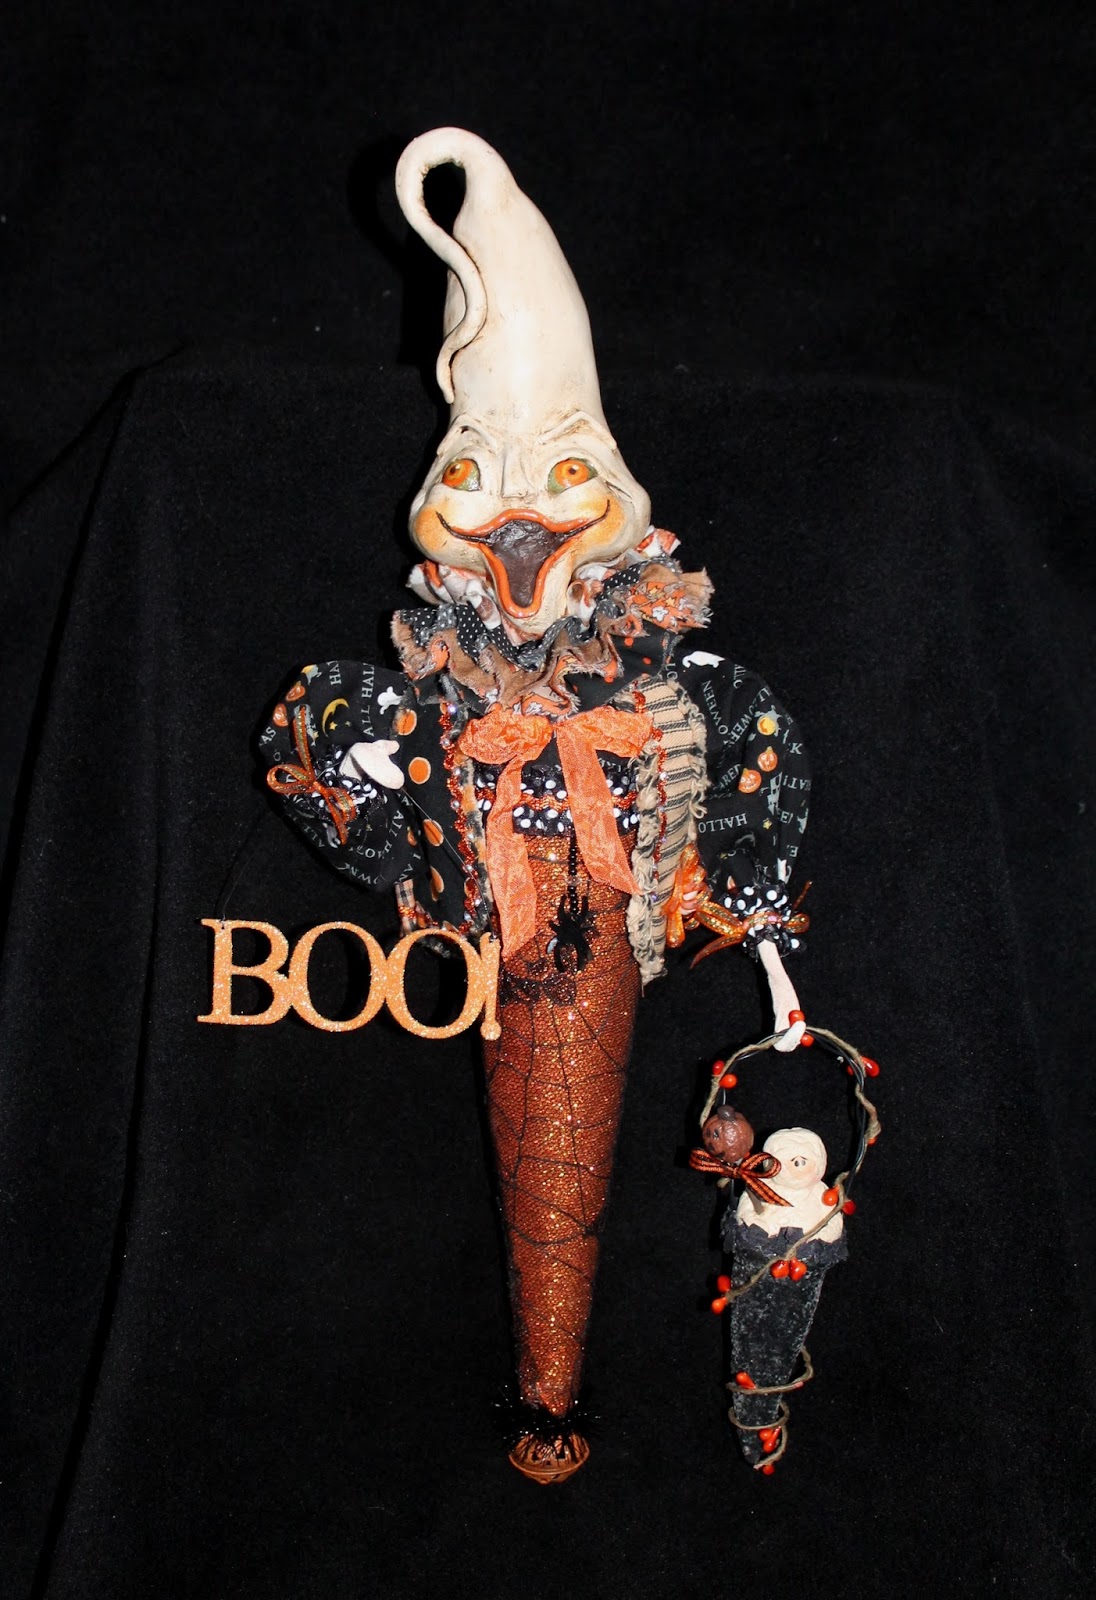
Billy is part Paper Mache and part soft sculpture doll.  He is 20 inches tall and about 14 inches wide.   His arms are detailed in acrylic paint.  They are lightly wired for posing and holding very light objects. 


Billy’s head is fashioned as a ghoul from paper clay and hand painted.  His shirt is fashioned from a black ghostly print fabric with decorative trim. It is secured by a dowel embedded deep into Styrofoam inside the paper mache cone in which he sits


Billy is secured by a dowel embedded deep into the Styrofoam cone.  The cone is covered in glittered sheet foam and with a bat lace overlay. The rim of the cone is lined with several decorative trims.  Billy carries a little Mummy in a cone in one hand and greets his guests with the other!

Billy may go home with you for a fee of 125.00 plus 15.00 travel fare.

My Best Always,

Carly


Snowmen!


Just a Halloween  Artist trying to fit in a little Christmas and Winter!
\
These guys will be ready in no time...let me know if you are interested...

My Best Always,

Carly

Wednesday, December 7, 2016

Bunny Update!


Well, he is assembled and his face just needs a little toning...How do you like him?


Carly
nk?

Tuesday, December 6, 2016

Well...hello there everyone... if you are still out there...I think I'm on my way back! I have been out this past year due to illness... If anyone gets this ...please respond to me here. I've missed everyone and making dolls again after everything, is refreshing!

STILL UNPACKING my studio, but taking a break to make a Christmas Bunny! Of all things! This is the 1st painting (I do several layers) of the bunny's head. Let's just see what this Halloween Artist can do on a bunny....let me know what you think...! Well right now he is wearing a halloween hat...not his.


My Best Always,
Carly Smith

Wednesday, November 23, 2016

Wow….well, It’s been about a year since I blogged or did any serious Facebook time…never meant to go away…life just got very hard…very hard, indeed.  Last Dec-Jan I had 3 hip surgeries with incision from my knee to my hip! I was in the hospital 3 months. I don’t talk about it much, but want everyone to know I’m still here and why I’ve been gone. I have been healing, pondering life and all that important stuff!  LOL!. During all that time, plans to move to Hawaii were underway.

The last surgery (last January and still healing) got infected and I lost my left hip and the top of my thigh bone…yep, nothing in the way of bone in that area now.  But…believe it or not…I am learning to walk!!!  An extra high shoe presses the leg up in the hip area and it gets braced up that way and the leg stays in place!  I am still in a W/C most of the time, but hoping to develop a walk!

Walked 210 feet one day at physical therapy…plan to do more!  Oh, I forgot to say I am living in Hawaii for 3 years for a project my husband is working on.  He is a Structural Engineer and is away a lot.  It is a beautiful place, I must find a way to go swimming in the ocean!  (you can’t take a walker in the sand and “sand” wheelchairs are not that great, but I’ll find a way)
We moved to Hawaii October 1st., but didn’t see the moving truck until Oct. 31! I am busy unpacking all my studio supplies and all my Halloween treasures.   They are in stacks of boxes that seem a mile high! How I wish they were unpacked and organized with a “twitch” of my nose!  Unpacking and Physical Therapy takes up a lot of the time, but I miss the Doll World!

During unpacking, I found lots of things including some of my published dolls that have NEVER been up for sale before!  The only place they’ve been is to the publisher’s and back. I have other dolls that I am looking forward to finally finishing.  I had wanted to take them to a show, but it seems more fittin’ that they find a good home, as I’m not sure when I will be at a show and just want to load up my Etsy Store….It’s been empty too long!


Introducing Adele, the Sunflower Bunny  from PRIMS Magazine 2
015 Fall Issue (vol. 6 issue 3)

Please come to my Etsy Store  at Boggy Bottom Bayou . Have a look at the dolls on Facebook as they enter my shop FOR SALE!!!


My Best Always,

Carly

Tuesday, November 17, 2015

Snowman Challenge!


Snowman Challenge!


We have some exciting news here at Witches of Giggleswick on FaceBook!!! We sre going to have a Snowman Challenge!   Then we will have a snowman sale day! Please see picture above for details!


Game on!  Come on and join the FUN!

My Best Always,

Carly